How to setup WordPress on Synology Docker
WordPress is the most used blog platform, but is it the best?

WordPress is the easiest blogging platform to host, so why not selfhost and use your own domain without paying extra for that feature?
Synology has an existing package for WordPress, should you use that? Or what if you have more than 1 webpage to host? You might even consider using the new mulit-site feature on WordPress.
Otherwise, here's how you can set it up on Synology Docker.
Prerequisites
- Go to Package Center and install Docker
- Go to File stations and navigate to Docker folder
- Create two folders,
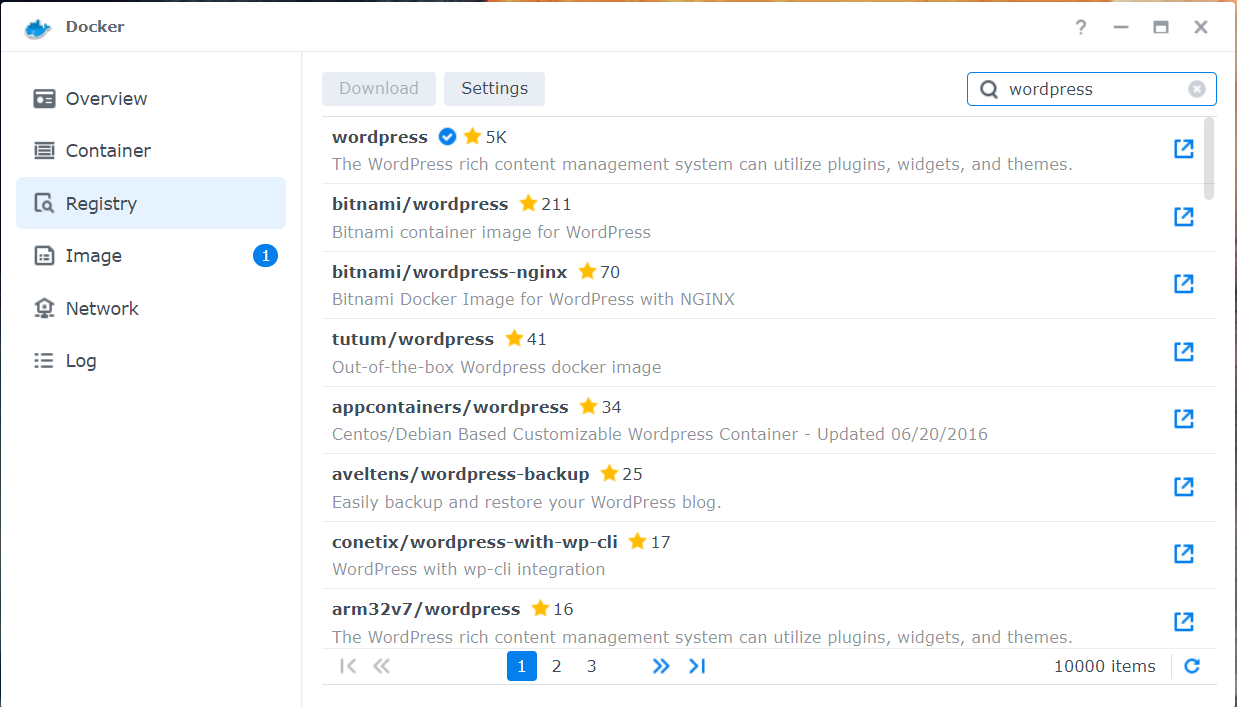
wp-appandwp-db - Open Docker on Synology and select Registry tab
- Search for
WordPressandMySQL, download both withlatesttag
- Buy me a drink on Ko-fi :)
Create MySQL Container
- Go to Container tab and Create a Container:
- Select Image: mysql
- Network: bridge
- Container Name: wp-db
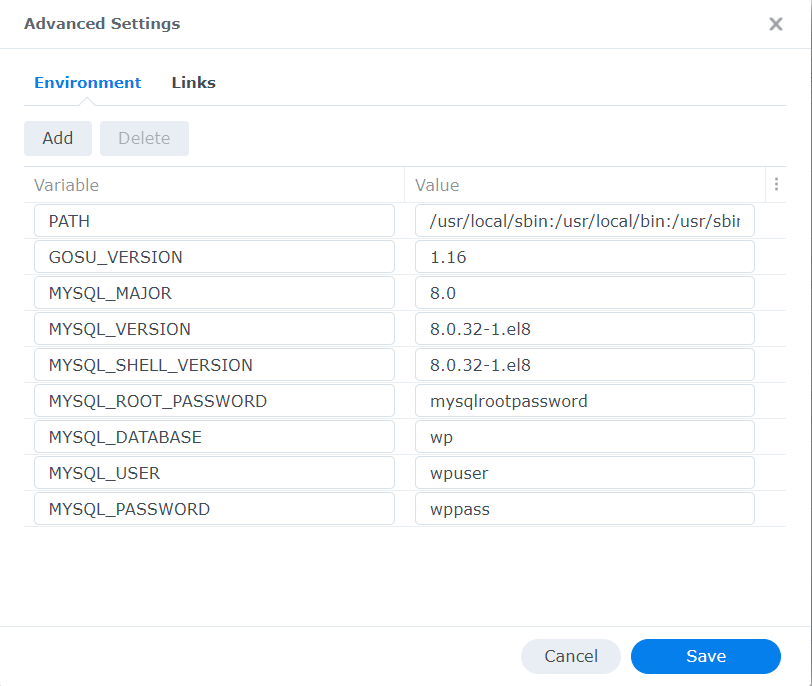
- Go to Advanced Settings
- Add the following Enviroment variables:
- MYSQL_ROOT_PASSWORD = mysqlrootpassword
- MYSQL_DATABASE = wp
- MYSQL_USER = wpuser
- MYSQL_PASSWORD = wppass
- Review, click Save, then Next
- Leave the Port settings as default, click Next
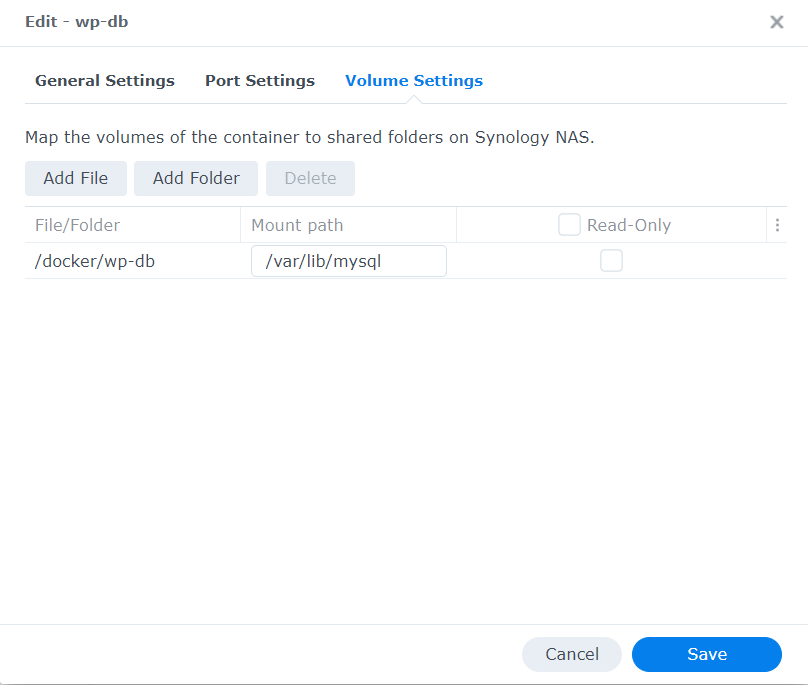
- Click Add Folder, navigate to the
wp-dbfolder - Add the mount path as
/var/lib/mysql
- Click Next and Done
Before you continue, be sure to check that the DB is ready. This should take ~5 mins.
While waiting, go to Prerequisites Step 6.
- Double-click the Container and go to Logs tab
- Look for the line that says
/usr/sbin/mysqld: ready for connections.
Create WordPress Container
- Go to Container tab and Create a Container:
- Select Image: wordpress
- Network: bridge
- Container Name: wp-app
- Enable auto-restart
- Go to Advanced Settings
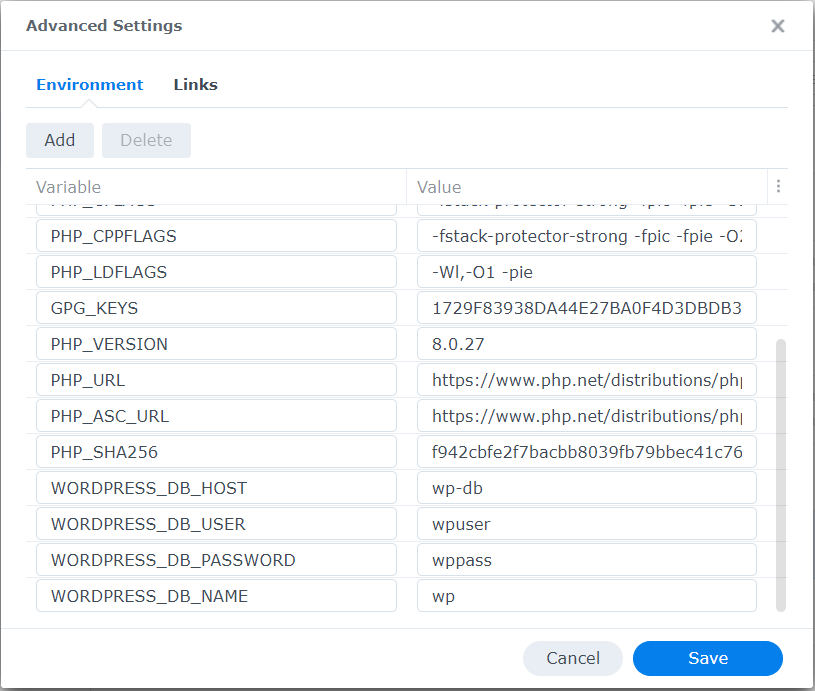
- Add the following Enviroment variables:
- WORDPRESS_DB_HOST = wp-db
- WORDPRESS_DB_USER = wpuser
- WORDPRESS_DB_PASSWORD = wppass
- WORDPRESS_DB_NAME = wp
- Select Links tab and click Add
- Select the Container name that you've created for MySQL, eg. wp-db
- Click Save, then Next
- Set the Local Port to
8080, click Next - Click Add Folder, navigate to the
wp-appfolder - Add the mount path as
/var/www/html

- Click Next and Done
Go get a coffee and send me a tip as this will take at least 5 mins and if you go to your NAS IP Address with the port you've defined above on a browser, eg. http://192.168.1.10:8080
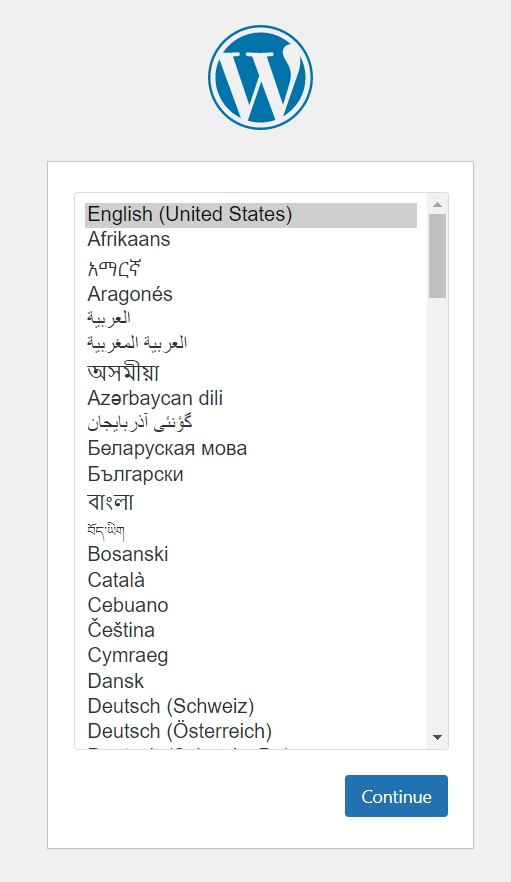
You'll be greeted WordPress installation screen.